How to Create a SharePoint Site – A Step-by-Step Guide

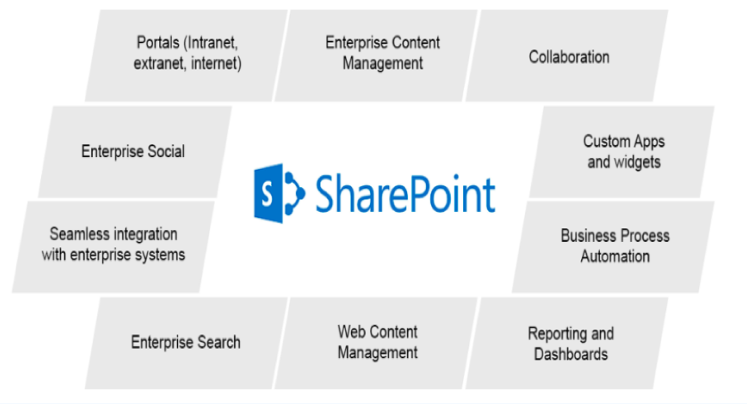
SharePoint offers seamless collaboration, document management, and integration capabilities for teams and organizations. Whether you’re managing a small team project or setting up an intranet for an enterprise, creating a SharePoint site can streamline your workflows and improve productivity. This guide provides a detailed, step-by-step process to help you create a SharePoint site and customize it to meet your specific needs. Learn how to create a SharePoint site tailored to your requirements and optimize its features for your team or organization.
Step 1: Decide on the Purpose of Your SharePoint Site
Before creating a SharePoint site, it’s crucial to define its purpose. SharePoint supports two main types of sites. When planning a SharePoint site, it is vital to identify its principal goals. There are two main categories of sites that can be created in SharePoint.
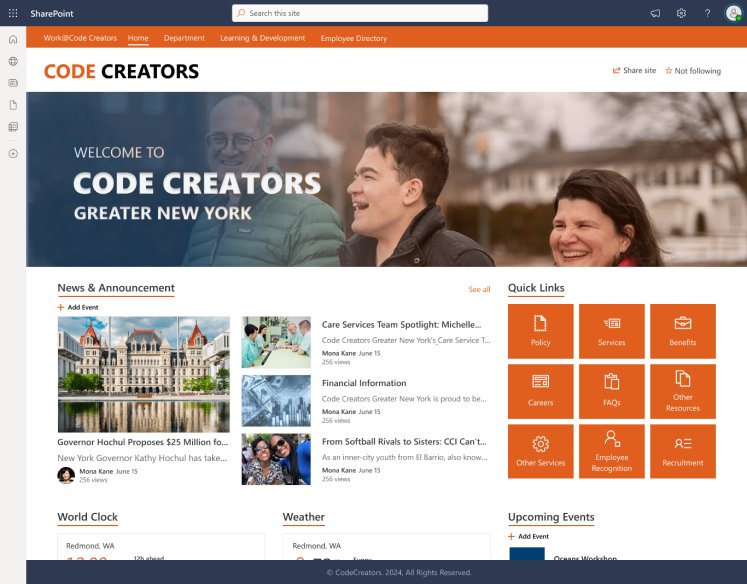
- Team Site: Designed for internal collaboration among a group of people. It is used for document sharing, task tracking, and real-time collaboration. Suitable for a group of people who are working together in the same company or organization.
- Communication Site: Primarily for broadcasting information to a wider audience, such as announcements, reports, or updates.
Step 2: Access SharePoint Online
To get started, log in to your Microsoft 365 account.
- Navigate to the App Launcher (the grid icon in the upper-left corner of the Microsoft 365 portal).
- Click on SharePoint from the list of available apps.
If you’re unable to find SharePoint, check with your administrator to ensure your account has the necessary permissions. SharePoint may not be immediately visible, so if you can’t locate it, consult your administrator and confirm whether your account has the right permissions to access it.
Step 3: Create a New SharePoint Site
Once you’re in the SharePoint interface:
- Click on “Create Site” (This button is usually available on the top-left corner of the SharePoint homepage).
- Choose the Site Type.
- Enter Site Information such as site name and description.
- Click “Next”: SharePoint will create your site within seconds.
Step 4: Add Members and Set Permissions
After setting up the site, you can invite other team members and distribute the correct level of access.
- Add Members: Select “Add Members” and input the emails of people you would like to include in your team.
- Set Permissions: Set permissions such as owners, members and visitors.
To be more precise, it is crucial to assign concrete permissions properly to achieve proper flexibility and protection against unauthorized access.
Step 5: Customize Your SharePoint Site
SharePoint sites are very flexible solutions that can be tailored to the needs of the organization. Use the following features to personalize your site:
1. Change the Site Theme
- Go to Settings (gear icon) > Change the look > Theme.
- Choose from predefined themes or customize your own by adjusting colors and fonts.
2. Add a Logo
- Navigate to Settings > Site Information > Upload a Logo.
3. Create and Organize Pages
- Use the “+ New” button to create additional pages for your site.
- Organize pages by adding links to the site navigation bar.
4. Add Web Parts
- Click Edit Page, then + Add a Web Part to insert elements like document libraries, calendars, or news feeds.
Step 6: Create Document Libraries
Libraries are required in SharePoint to manage documents on your site.
1. Add a Document Library
- Click + New > Document Library.
- Provide a name for the library and configure its settings, such as version control or folder permissions.
2. Organize Files
- Create folders and subfolders to structure your files logically.
- Use metadata tagging for easier file searches.
3. Enable Co-Authoring
- Enable various team members to work on a document and see changes made by others in real-time.
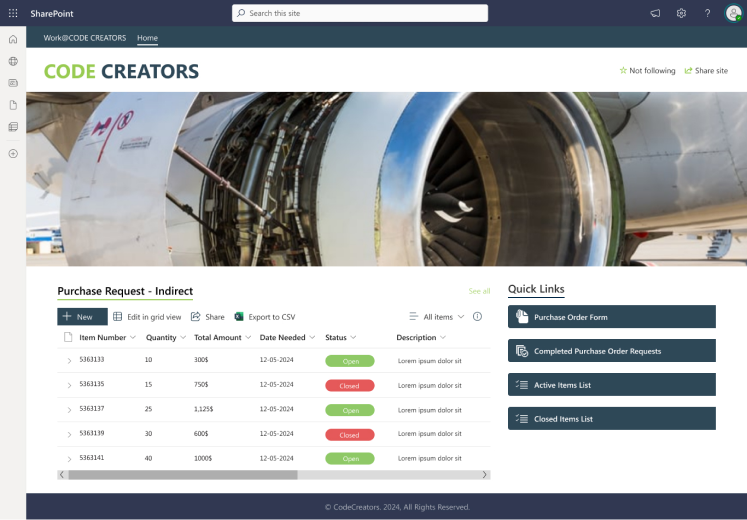
Step 7: Set Up Lists
Lists are employed for arranging and administering the data in an orderly manner. It can be generalized for many purposes, which include tracking work, inventory, and many others.
1. Create a List
- Click + New > List.
- Select a blank list or use a template (e.g., Tasks, Events, Issues).
2. Customize Columns
- Add columns for data like text, dates, numbers, or choice fields. Adjust column order and default settings to suit your workflow.
3. Automate Processes
- You can also create workflows based on your lists using Power Automate. For instance, set notifications for a task due date or an approval request.
Step 8: Configure Site Navigation
A well-organized navigation system ensures users can easily find what they’re looking for.
1. Edit the Navigation Bar
- Click on Edit in the left-hand menu or top navigation bar. Add links to important pages, libraries, or external resources.
2. Use Hub Sites
- When working with several SharePoint sites, it is possible to add all of them to the hub site to have all the pages easily accessed.
3. Enable Mega Menus
- For complex sites, enable mega menus to organize links into categories and subcategories.
Step 9: Enable Sharing and Collaboration
SharePoint makes collaboration simple with its sharing features such as
1. Share Files and Folders
- Use the Share button to send files or folders to team members. Set sharing permissions, such as view-only or edit access.
2. Enable Version History
- Keep track of changes to documents with version history. This allows you to view, restore, or compare previous versions of files.
3. Integrate Microsoft Teams
- Link your SharePoint site with Microsoft Teams to enhance communication and collaboration.
Step 10: Optimize Site Performance
To ensure your SharePoint site runs smoothly:
1. Regularly Review Content
- Remove outdated files or pages to keep the site relevant. Use analytics tools to monitor usage and identify areas for improvement.
2. Enable Search Customization
- Optimize the search bar with filters and keywords for faster retrieval of information.
3. Test Site Accessibility
- Ensure the site is user-friendly and accessible to everyone, including individuals with disabilities.
Conclusion
Setting up a SharePoint site can be accomplished quickly and easily but getting the most out of it takes proper planning and configuration. With these detailed instructions, it is easy to create a SharePoint site that will improve communication and knowledge sharing, as well as provide access to materials and tools that will be specific to the needs of your organization.
If you’re looking for expert guidance, Code Creators is a trusted SharePoint consultant specializing in SharePoint development services. From custom site design to advanced integrations, we ensure your SharePoint solution is optimized for success. Reach out to us to get started today!
Author

As the CTO at Code Creators, I drive technological innovation, spearhead strategic planning, and lead teams to create cutting-edge, customized solutions that empower clients and elevate business performance.